In this lesson, we will learn how to carry out the structural design of beams in CSC Orion18.
In this beam design, we will learn how to carry out the design in batch mode (designing all the beams at the same time by the software), as well as interactively (designing one beam at a time). We will also learn to produce the load, shear force diagram, bending moment diagram and print out the design report.
Step 1
Click ‘Run’, then ‘Beam Section Design and Detailing’. Among the options, select ‘Storey Beams’. A ‘BEAM SECTION DESIGN AND DETAILING’ dialog box appears.
Step 2
In that dialog box, Click ‘Beam Design (Batch Mode)’. From the ‘Beam Reinforcement Design’ dialog box that appears, Select ‘Check Steel (Don’t select new steel when previous bars are insufficient)’. This option ensures that the bar size we selected when we were analysing the building is not changed by the software during structural design and possibly producing an unpractical design. Click ‘Calculate’.
Step 3
After carrying out our beam design, we noticed that some beams failed (marked ‘X’). For example, the beam on axis ‘B’. Double click on that beam to carry out interactive beam design.
The aim during the interactive design is to ensure that there are no more ‘red coloured’ digits in the ‘Reinforcement Data’ dialog box. Click on each reinforcement, then make changes as shown in the image below.
Step 4
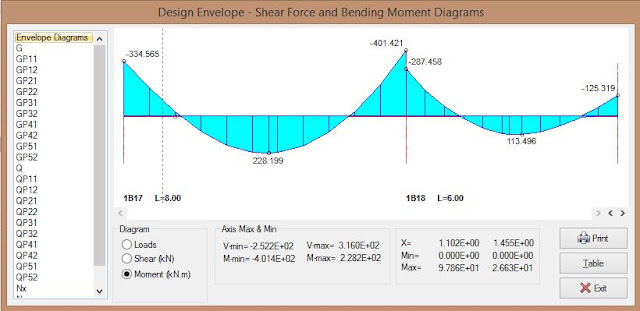
Now, we will show the design envelope for the beam. To do so, Click on ‘Diagrams’, in the ‘Reinforcement Data – Axis H’ dialog box. The moment diagram appears. To view the load and shear diagrams, select them from the bottom of the ‘Design Envelope – Shear Force and Bending Moment Diagrams’ dialog box.
Step 5
To create the design reports, Click ‘Design Report’, then click ‘OK’ in the ‘BEAM SECTION DESIGN AND DETAILING’ dialog box.
ORION 18: HOW TO DESIGN BEAM
 Reviewed by Izuchukwu Obi
on
21:46:00
Rating:
 Reviewed by Izuchukwu Obi
on
21:46:00
Rating:


No comments: